What's new in Redirect-301: traffic statistics and a REST API
You can now see how many visits each redirect, custom path and QR code gets, and manage everything from your own code with the new REST API.
Two new features
This is the first of our "what's new" posts, where we'll share what changed in Redirect-301 from time to time. This time there are two features: traffic statistics for every redirect, and a REST API to manage your redirects from your own code.
Traffic statistics
Open any redirect in your dashboard and scroll to Traffic. You'll see how many requests it received, with three views:
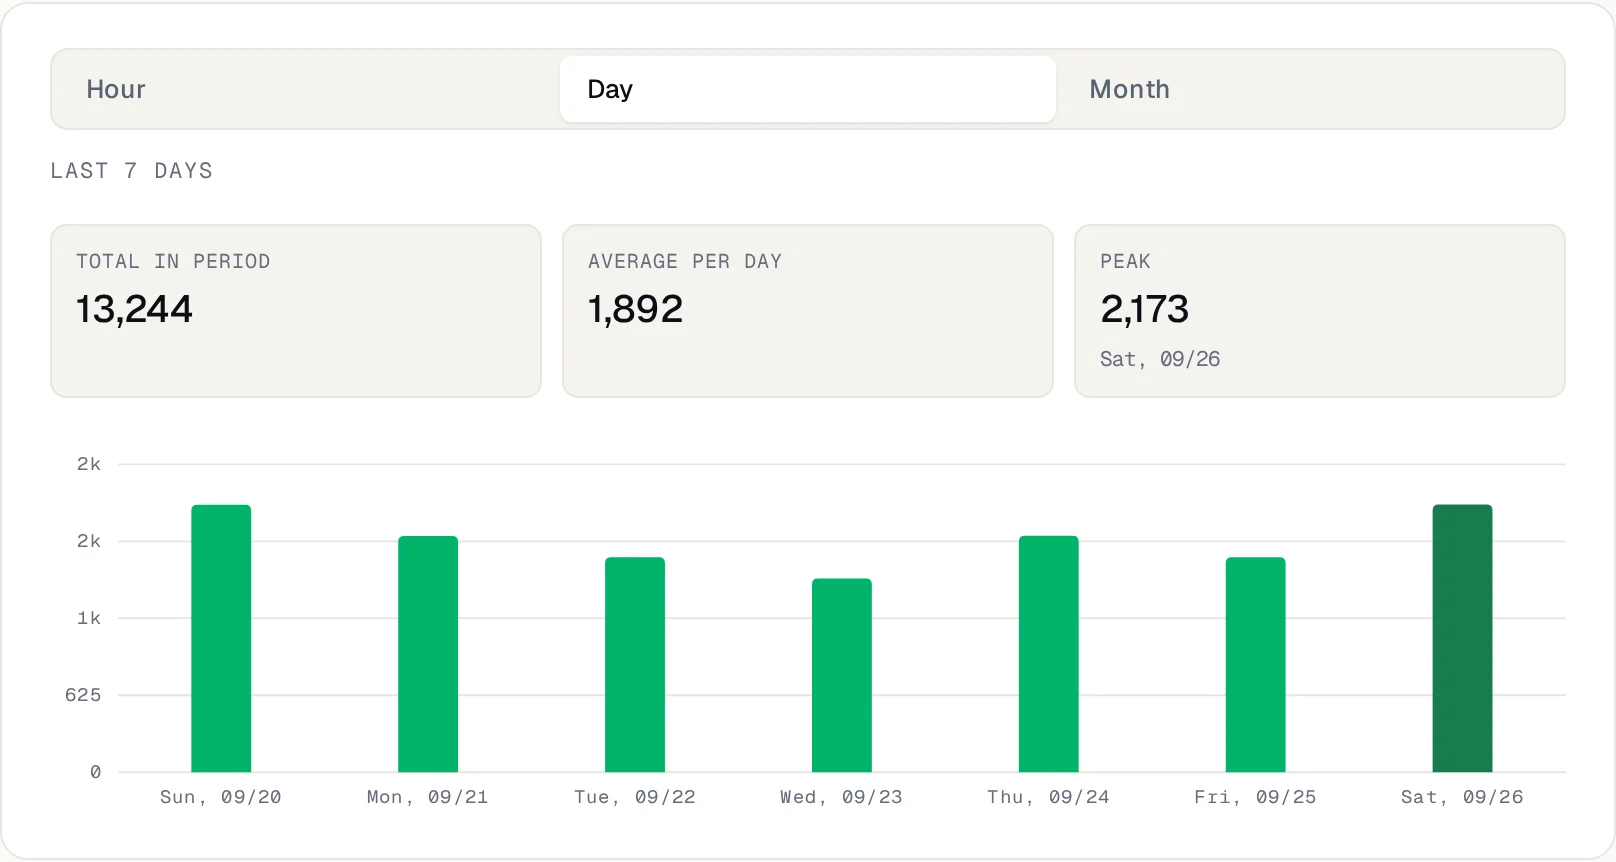
Each view also shows the total, the average and the peak, so you can tell at a glance whether a campaign, an email or a printed flyer brought visits.
It doesn't stop at the domain. Each custom path shows its own visits, and how many of them came from a QR code. Each QR code shows how many times it was scanned:
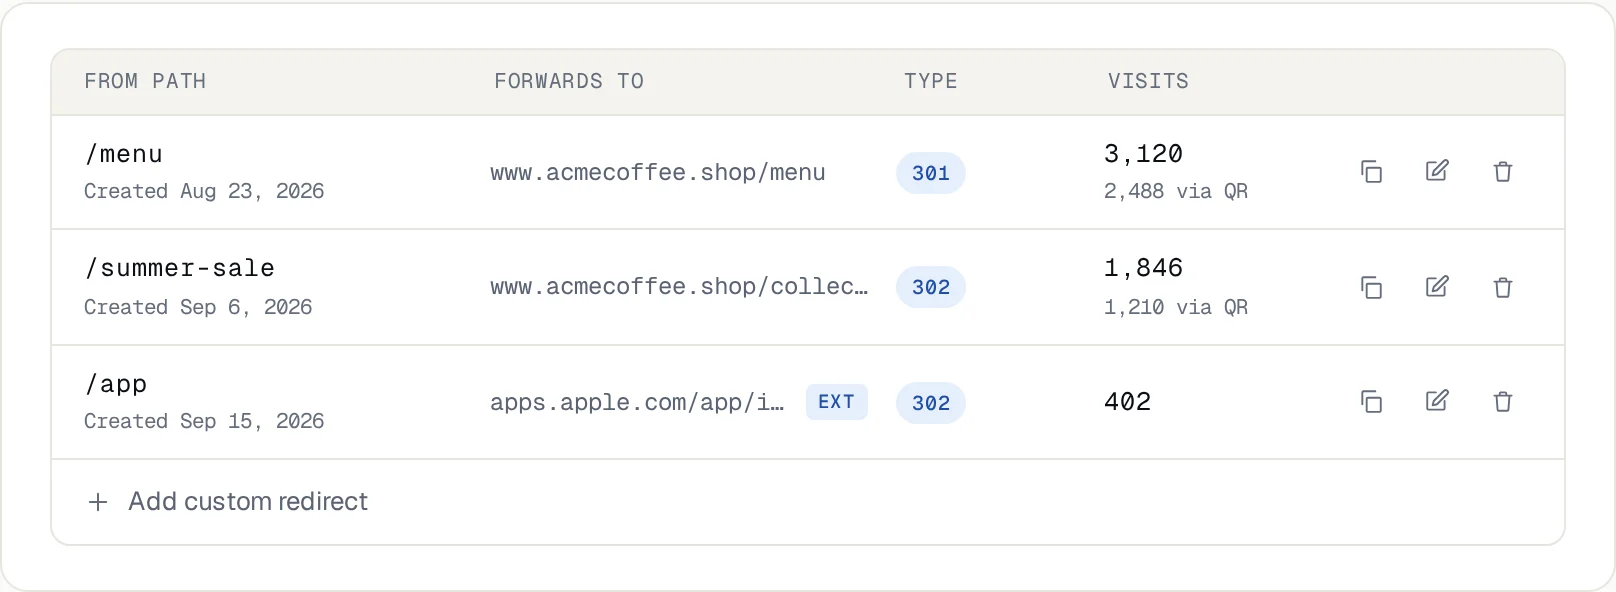
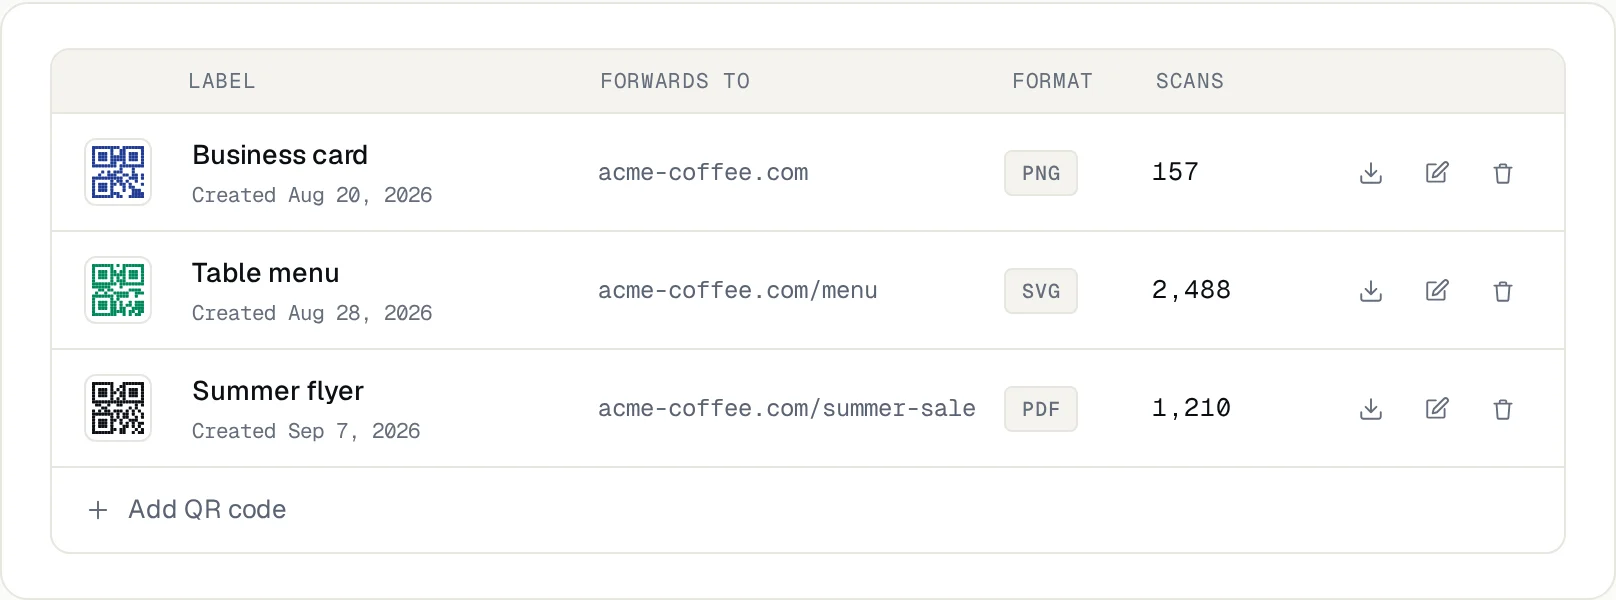
Statistics update about every 5 minutes and are included in every plan. Visits to paths and QR codes count only requests that were actually redirected. Link previews (WhatsApp, Slack, iMessage…) open a link when it is shared, so they can add a few visits.
REST API
Everything you do in the dashboard with redirects, custom paths and QR codes can now be done from your own code. Some examples:
The API is included in the Studio and Enterprise plans. To start:
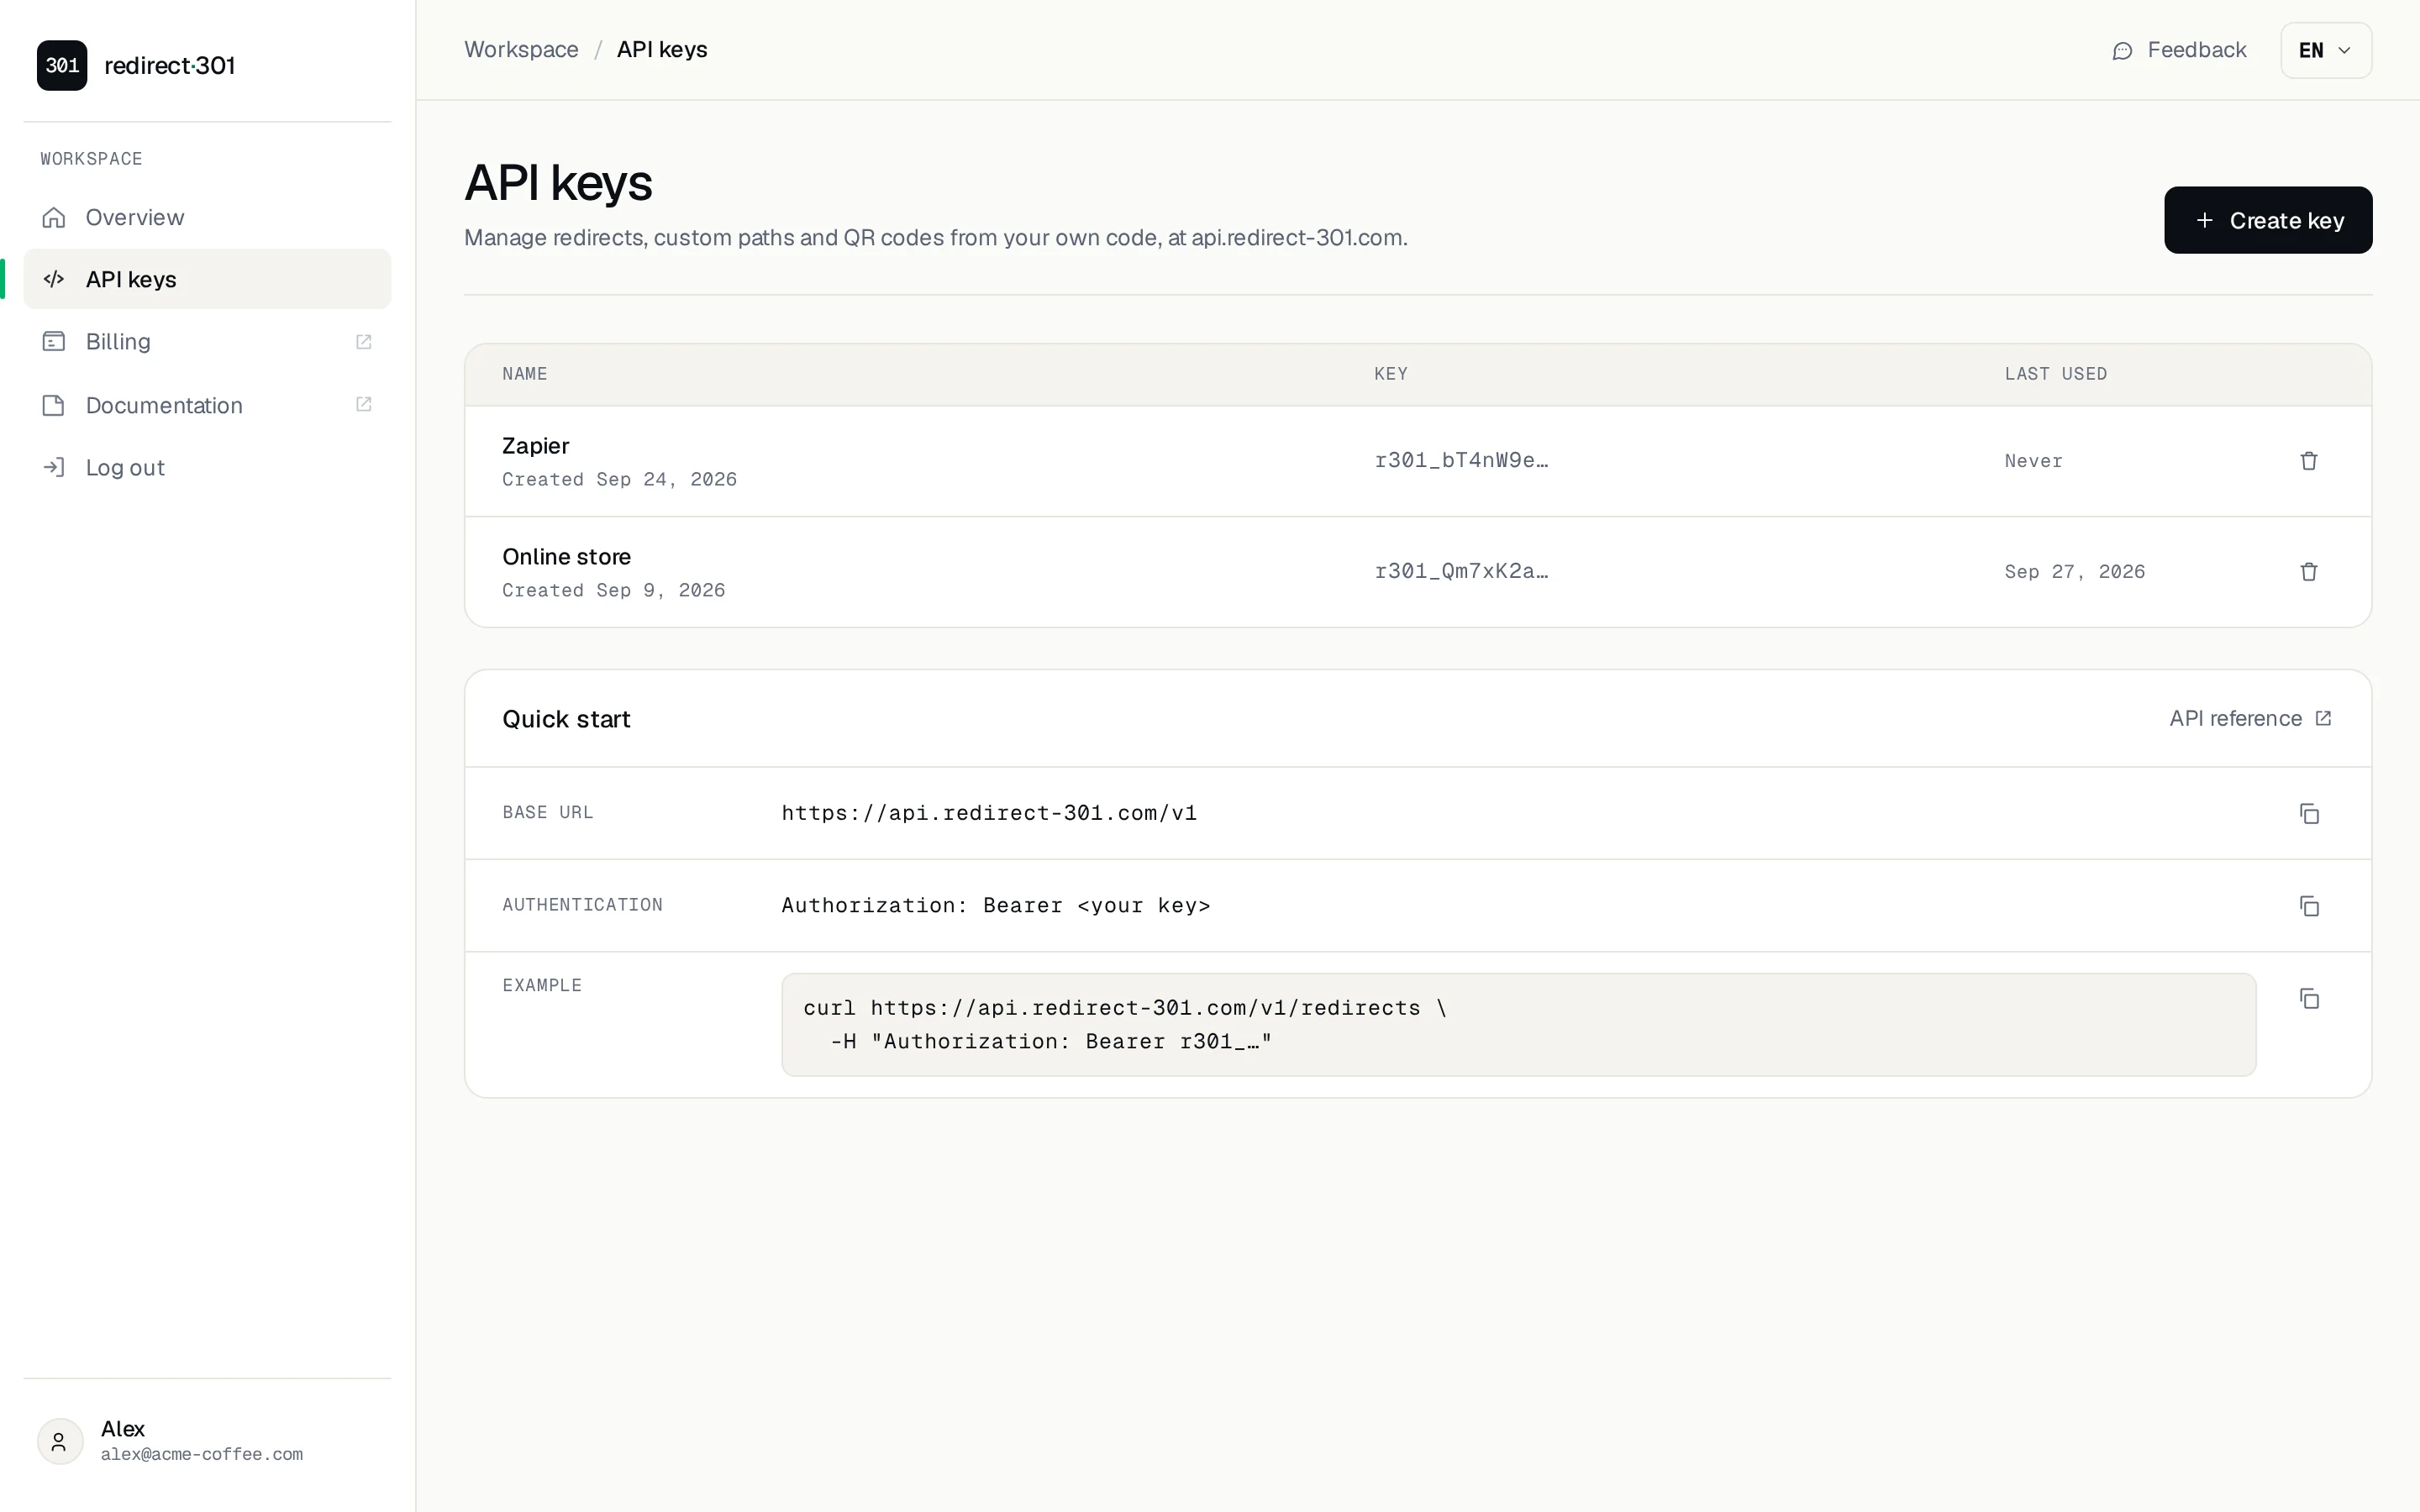
- In the dashboard, click API keys in the sidebar.
- Click Create key, give it a name and copy the key: it is shown only once.
- Send it in every request as
Authorization: Bearer <your key>.
Creating a redirect is a single request:
curl -X POST https://api.redirect-301.com/v1/redirects \
  -H "Authorization: Bearer $R301_KEY" \
  -H "Content-Type: application/json" \
  -d '{"host": "old-brand.com", "redirectTo": "https://new-brand.com"}'
The response includes the DNS record to create, and you can follow the DNS and certificate state with the /status endpoint. You can have up to 10 active keys, and each one can make 60 requests per minute. Every endpoint, with examples, is in the API reference.
Tell us what you need
Many of these features came from requests from people using Redirect-301. If there's something you'd like to see, use the Feedback button in the dashboard or talk to us on WhatsApp. You can also read how to set everything up in the configuration guide.
Need help?
Feel free to reach out to us with any questions. We're here to help! Scan the QR code or click the button below to join our WhatsApp group.
Open WhatsApp →