Configuration Guide
Everything you need to set up and manage your redirects, custom paths, and QR codes.
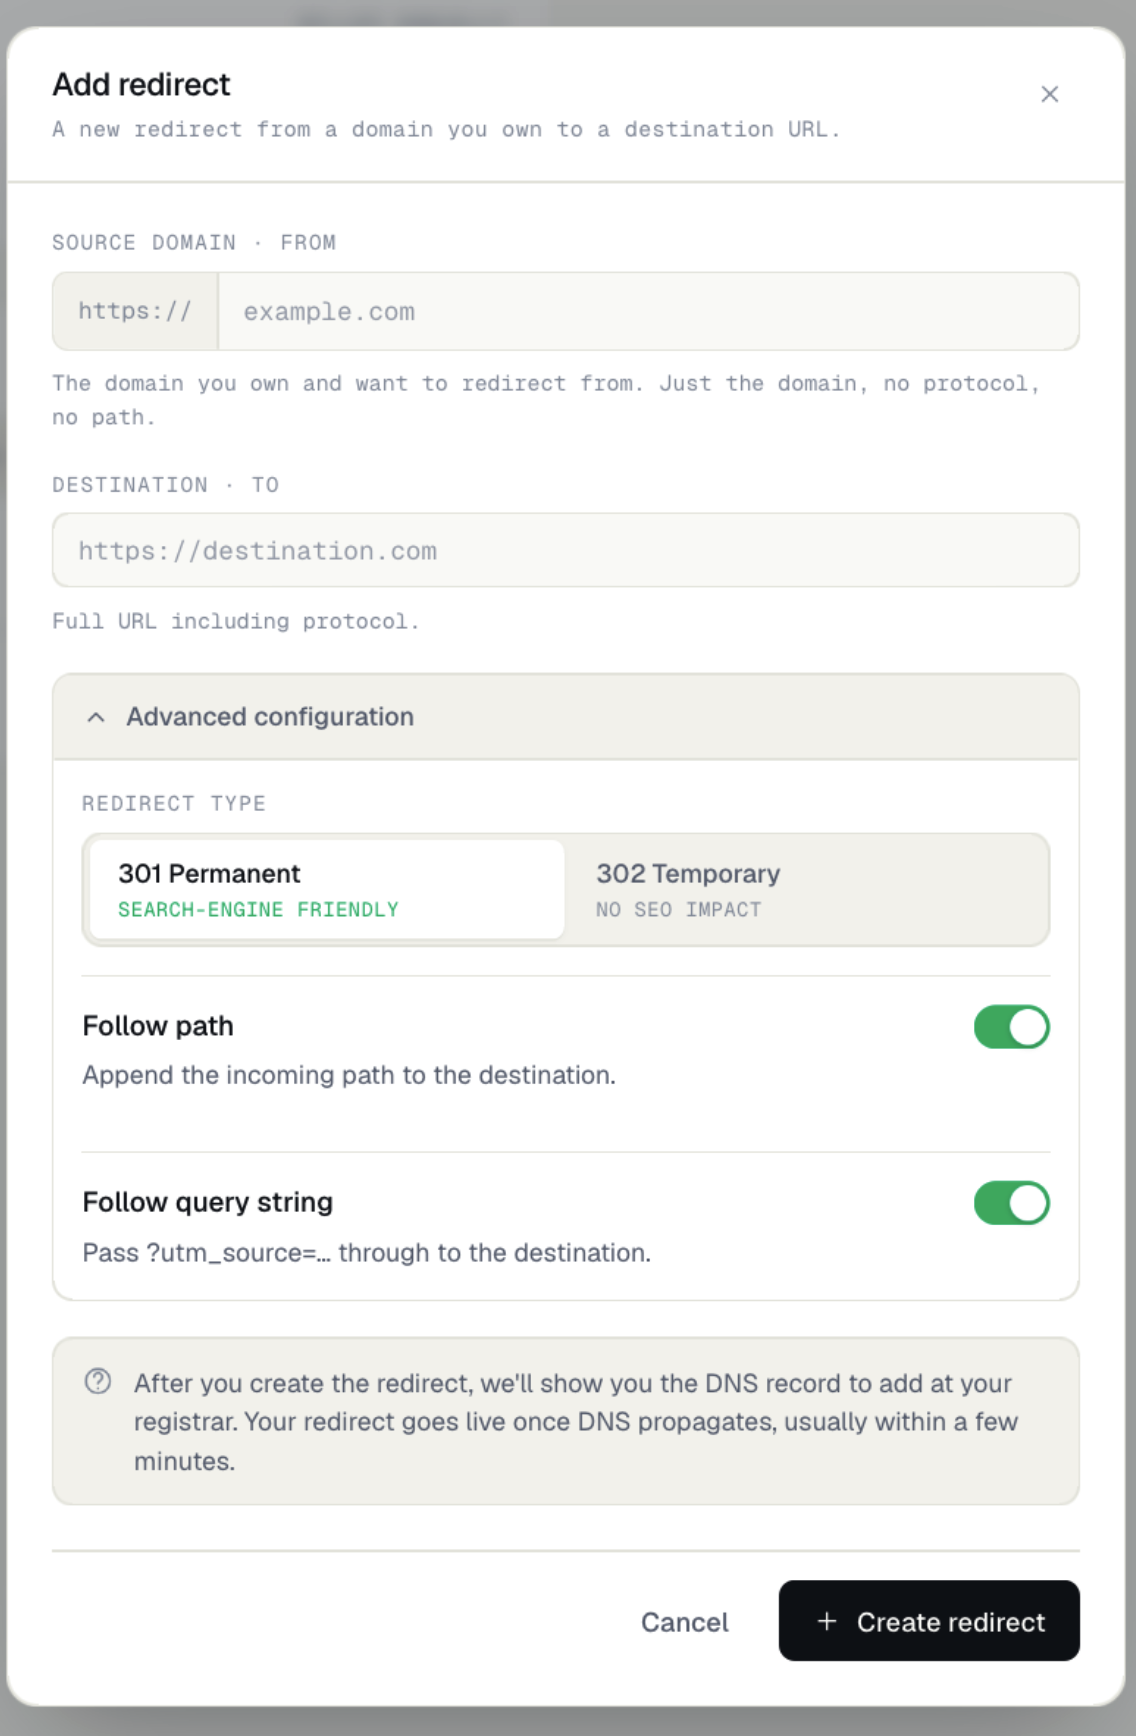
Add your redirect
From the dashboard, click "Add redirect". Enter the source domain you own (no protocol, no path, just the domain), the destination URL, and choose the redirect type.
Point your DNS
Add an A record at your DNS provider (GoDaddy, Cloudflare, Registro.br, or any other). The Host value depends on which part of your domain you are redirecting. Once the record propagates, we automatically issue and install your SSL certificate via Let's Encrypt.
| Source domain | Host | Type | Value |
|---|---|---|---|
| example.com | @ | A | 18.215.89.131 |
| www.example.com | www | A | 18.215.89.131 |
| shop.example.com | shop | A | 18.215.89.131 |
Use @ for the root domain, or the subdomain name (www, shop, etc.) for any subdomain. DNS propagation typically takes a few minutes. The redirect detail page shows verification status in real time.
Redirect detail page
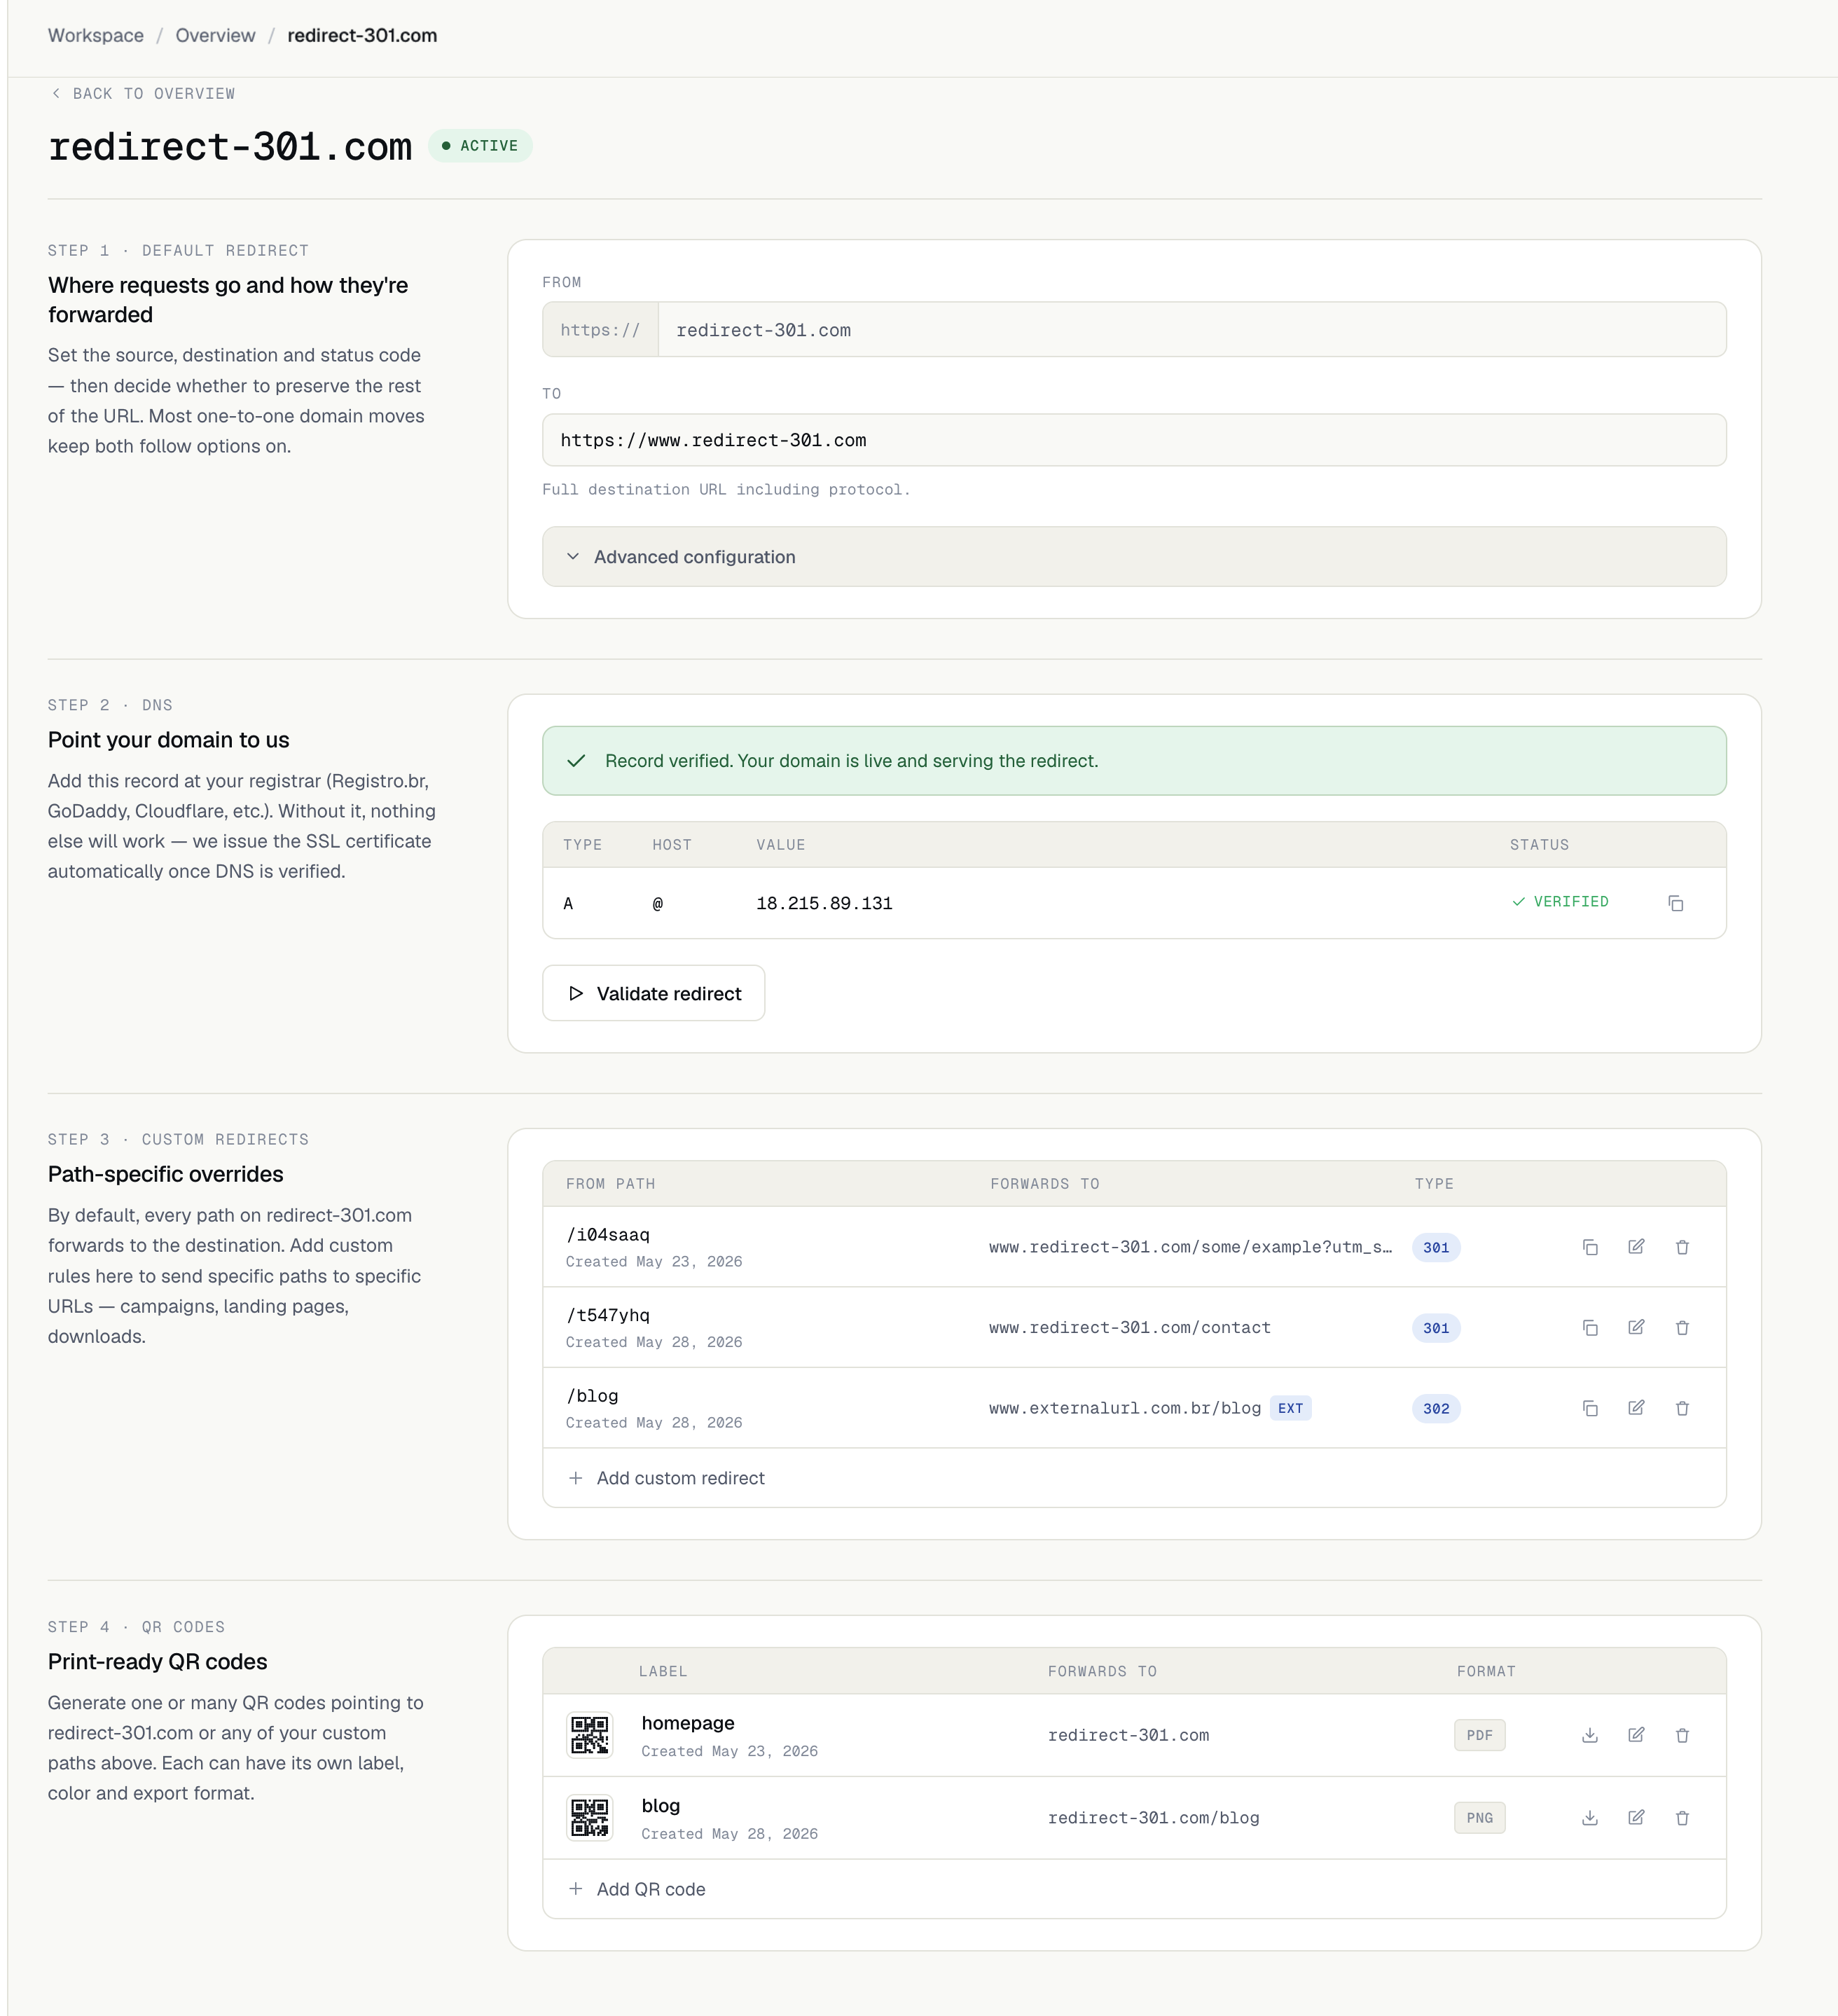
Once created, the redirect detail page gives you a complete view of your setup: the default redirect rule, DNS status, custom path overrides, and QR codes, all in one place.
Custom redirects
By default, every path on your source domain forwards to the destination. Custom redirects let you override specific paths and send them to different URLs. Useful for campaigns, landing pages, or preserving specific pages during a migration.
Each custom redirect can also have its own redirect type (301 or 302) and can point to an absolute external URL or a relative path on the destination domain.
QR codes
Generate print-ready QR codes pointing to your domain root or any of your custom redirect paths. Each QR code has its own label, foreground color, and export format.
Need help?
Feel free to reach out to us with any questions. We're here to help! Scan the QR code or click the button below to join our WhatsApp group.
Open WhatsApp →